
The impeller is a vital part of the engine cooling system and must be inspected and replaced frequently even during routine use. When the impeller is broken, it will make the engine overheat and stall. It is hugely risky for the engine to fail at sea. Therefore, having a spare impeller or two and learning how to replace them personally is one of the things that a sailor has to know, as there is no mechanic out in the middle of the ocean.
Why does the impeller need regular inspection?
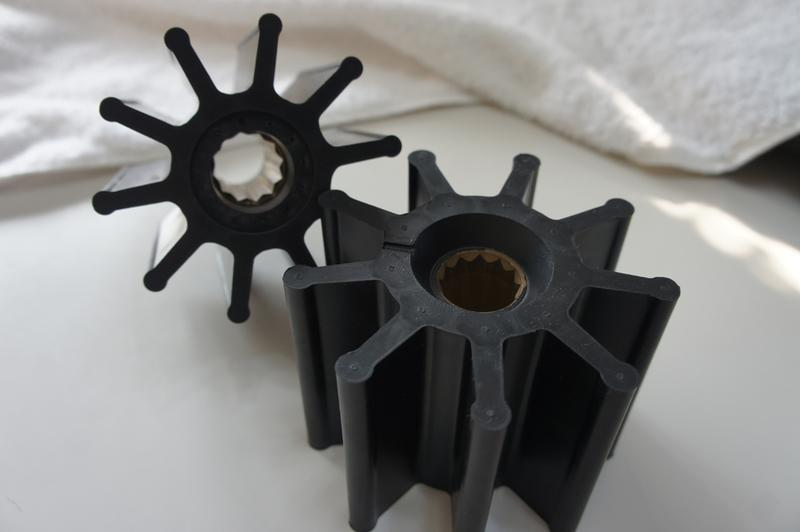
Most marine impellers are made of rubber or polymer materials with fine elasticity and resistance to corrosion. However, in a hot environment of high-temperature dry-running or an impure seawater condition, the materials are highly prone to cracking, breaking, or aging.
If not subjected to regular maintenance and inspection, the impeller can be harmed because of the following reasons:
The cooling efficiency of the engine decreases, and the temperature rises abnormally. When the impeller is worn, deformed, or cracked, the pumping capacity weakens and the coolant flow is inadequate. The engine can no longer cool in time, and the water temperature will rise step by step, and may trigger a high-temperature alarm.
The seawater or coolant circulation is interrupted, leading to system overheating. In the case of impeller that is severely damaged or separated, the flow of the coolant will completely be shut down. The release of the heat can’t happen, and as a result, not only the engine is overheated, but also it might make the cylinder warped or the lubrication oil degraded.
The broken blades block the pipeline, causing secondary damage. The fallen rubber blades will more likely be carried into the cooling channel, leading to blockage of the cooling pipeline or heat exchanger and completely paralyzing the cooling system, making cleaning and maintenance difficult.
The equipment failure escalates, resulting in high maintenance costs and even affecting navigation safety. Leaving the problem of the impeller unsolved for a long time may lead to serious damage to the engine, heat exchange system breakdown, or engine stalling during navigation. Not only will this lead to excessive maintenance expenses but also threaten the safety of the vessel.

Inspection Steps for the Impeller
During the routine maintenance when the ship is in harbor or during planned equipment maintenance, I can examine the impeller of the cooling water pump in detail by following the following procedure to confirm it’s good working condition and not fail when in use.
Turn off the engine and wait for the pump body to cool down completely.
Before initiating any operation of maintenance, the engine should be allowed to shut down completely and afford enough time to the water pump to cool to room temperature to avoid scalding by heat and warpage or destruction of components by thermal stress while taking out.
Disconnect the power supply and close the inlet and outlet water valves.
Ensure that the power supply for the impeller pump or the control switch is switched off in order to prevent accidental starting of the pump. In the meantime, close down the relevant inlet and outlet valves of water in order to prevent seawater backflow or coolant leakage during removal and inspection to cause equipment immersion in water or environmental pollution in operations.
Remove the pump cover.
Utilize a hexagon wrench, screwdriver, or the tool specifically designed to fit the design of the pump cover to unscrew the screws securing the pump cover one at a time. Gently observe storing the screws to avoid losing them. Apply equal force in disassembling to prevent the pump cover from warping or sticking.
Take out the impeller.
The impeller is usually connected to the pump shaft by the central shaft. When loose, it can be easily pulled out by hand; when closely fitted or a little rusty due to long-time operation, it can be pulled out smoothly with a special impeller puller. Don’t pull it tightly to prevent damaging the pump casing or the impeller itself.
Then check the impeller condition, and observe the following points:
Are there any cracks, defects, or cracks? Observe carefully if there are clear structural damages to the impeller blades, i.e., fractures, lost corners, or surface cracks, which will directly affect the water flow thrust and cooling effect.
Are the blades hard, deformed, or have lost their elasticity? A well-designed impeller should have a good flexibility and must show a certain level of bending when pressed gently by hand. If it is noticed that the blades are old, rigid, warped, or cannot be repaired, then it means that the material has lost its properties and has to be replaced.
Is there any wear or looseness in the central hole? The impeller’s central hole is an important part fitted on the drive shaft. Check whether there exists excessive wear, dimensional looseness, or eccentricity, which will lead to running slippage or falling off.
Are there any burnt marks or melting and discoloration? If the impeller has blackened zones, edge melt, or persistent unusual smell on the surface, it is typically caused by dry running (run without water). In this case, the impeller failed and must be replaced as quickly as possible, and the pump body must be examined for damage.
Replacement of Marine Impellers
With the extended operation of the outboard engine or its damage during operation, the water pump impeller is likely to be damaged, causing the water pump to fail to operate normally, affecting the ship’s performance and utilization effect. In such a situation, the impeller must be replaced.
Preparation Stage
Before replacing the impeller, necessary tools and materials should be set ready. Set basic tools such as screwdrivers and wrenches ready, and purchase replacement impellers of the proper model through the proper channel. In addition, switch off the engine and all power tools on board, release the cooling water pressure, and drain the water pipe to make sure that the water pump can be disassembled smoothly.
Disassembly of the Old Impeller
1.Remove the water pump from the hull and put it onto a level workbench to be repaired.
2.Remove the casing of the water pump with a screwdriver or wrench. In most cases, the screws or bolts on the water pump must be unbolted.
3.Carefully remove the original impeller and clean it off in order to more closely inspect for any issues.
Selection of the Correct Replacement Impeller
Before purchasing a replacement impeller, ensure that the correct model of the impeller and a quality product certified is confirmed. In the meantime, check the location and diameter of the impeller hole and other parameters to ensure the replacement impeller is of the same size and shape as the original impeller to ensure precision of installation and operation.
Installation of the New Impeller
1.Install the new impeller in the water pump and ensure that the impeller is properly positioned.
2.Reinstall the water pump casing and ensure that the screws or bolts are tightened.
3.Close up the water pipe and ensure that all of its pipeline connections are tightened. While doing so, check if all the water pipes and the water pump have any cracks and leaks. Ensure that there is no leakage in the main water pipe and the outlet and inlet..
Testing
Once the water pump impeller has been replaced, start the engine and run the boat in the water for some time to verify the new impeller is working correctly. Especially when the volume of water is large, pay more attention to any exception to ensure the replaced impeller can be in a normal condition and durable.
Conclusion
The above is all the information regarding inspection of damage and replacement of marine impellers,hoping to be helpful to ship fans. Before replacing the impeller, you can read this article and according to the correct and professional working procedure, execute the correct installation steps, as well as select a high-quality replacement impeller to ensure the smooth replacement and stable operation of the water pump.


